English - 16
Your set has several settings which allow you to control
picture quality.
1. To select the desired picture effect, follow the
"Changing the Picture Standard" instructions number 1 to 3.
(On page 15)
2. Press the
▲
or
▼
button to select a particular item. Press the
ENTER
button.
3. Press the
◄
or
►
button to decrease or increase the value of
a particular item. Press the ENTER
button.
4. Press the EXIT
button to exit.
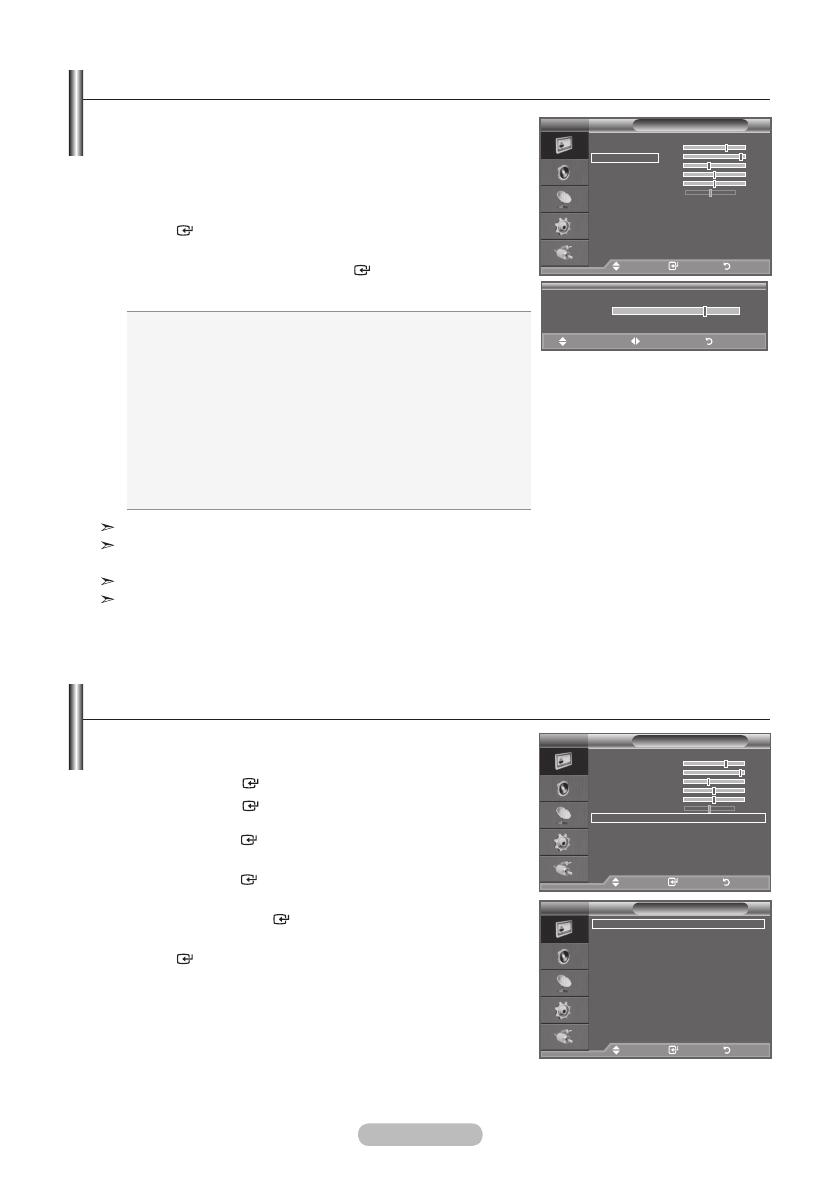
♦ Backlight: Adjusts the screen brightness by adjusting the
LCD backlight brightness. (0~10)
♦ Contrast: Adjusts the lightness and darkness between
objects and the background.
♦ Brightness: Adjusts the brightness of the whole screen.
♦ Sharpness: Adjusts the outline of objects to either
sharpen them or make them more dull.
♦ Colour: Adjusts the colours, making them lighter or
darker.
♦ Tint:
Adjusts the colour of objects, making them more red or
green for a more natural look.
The adjusted values are stored according to the selected Picture mode.
In PC mode, you can only make changes to "Backlight", "Contrast" and "Brightness". (32, 37 inch)
In PC mode, you can only make changes to "Contrast" and "Brightness". (40 inch)
In TV, Ext., AV, S-Video modes of the PAL system, you cannot use the "Tint" Function.
You can return to the factory defaults picture settings by selecting the "Reset".
(Refer to "Resetting the Picture Settings to the Factory Defaults" on page 17)
Adjusting the Custom Picture
Picture
Mode : Standard
Backlight 7
Contrast 95
Brightness
45
Sharpness 50
Colour 50
Tint G 50 R 50
Detailed Settings
Picture Options
Reset : OK
TV
Move Enter Return
7
▲
Backlight
▼
Move Adjust Return
You can set detailed picture settings.
1.
Press the MENU button to display the menu.
Press the ENTER
button, to select "Picture".
2. Press the ENTER
button to select “Mode”.
Press the ▲ or ▼ button to select “Standard” or “Movie”, then
press the ENTER
button.
3. Press the ▲ or ▼ button to select "Detailed Settings", then
press the ENTER
button.
4. Select the required option by pressing the ▲ or ▼ button,
then press the ENTER
button.
5.
When you are satisfied with your setting, press the
ENTER
button.
6.
Press the EXIT button to exit.
"Detailed Settings" is available in "Standard" or "Movie"
mode.
In PC mode, you can only make changes to
“Dynamic Contrast”, “Gamma” and “White Balance” from
among the “Detailed Settings” items.
➣
➣
Conguring Detailed Settings on the Picture
Detailed Settings
Black Adjust : Off
Dynamic Contrast
: Medium
Gamma : 0
Colour Space
: Native
White Balance
Flesh Tone : 0
Edge Enhancement : On
Move Enter Return
TV
Picture
Mode : Standard
Backlight 7
Contrast 95
Brightness
45
Sharpness 50
Colour 50
Tint G 50 R 50
Detailed Settings
Picture Options
Reset : OK
TV
Move Enter Return
BN68-01465A-Eng-0310.indd 16 2008-03-17 �� 4:43:33


